Thomas and Zilpah Ludlam House (ca. 1790)

Thomas and Zilpah Ludlam House (ca. 1790)
Thomas + Zilpah Ludlam House, ca. 1790

Saturday, August 13, 2011

Framing and Reclaimed Flooring

While Scotty and Jamie finish the roof, Scott (with some help from our friend, Al) has been framing the addition.  We're talking a lot of 2x4 studs and plywood sheathing here.  Incredibly, the addition--with door and window openings now--is really starting to look like something and we've only had the timber frame up for 3 weeks now.  Until we have the windows in place, we're keeping the side walls covered with tarps.  The windows (double-hung wood sash with true divided lights and thermo-pane glass) are here and I started the prep work on them today, filling screw holes with PC Woody. 

We are HUGE fans of PC Woody, a 2-part epoxy that is phenomenal when it comes to filling holes in wood.  It sands easily and now comes with colorants if you want to match a particular wood.  The windows are made of Spanish cedar and I'll be priming them with an oil-based primer.  A painter friend of ours swears by a latex primer, but I'm wary.  I'd rather use an oil-based primer (under a latex paint) that I know from personal experience works, than try something new and be unhappy with it a few years from now.


Scott scored a great find this week with just enough reclaimed, antique hard pine flooring to do our kitchen.  These boards are beautiful...up to 14" wide, unpainted on one side, but very very dirty.  I know all about scrubbing boards, so I'm not intimidated.  I'm anxious to see if the boards are pumpkin pine like we have in the main house.  There are some flaws, damaged areas, dings, etc., but we'll use PC Woody where needed.  Below is the pile that Scott has "stickered" to air out.

The reclaimed wood floor boards.  The opening in the stud wall to the left is for a bay window.

The Wonders of White Nail Polish

This post doesn't really relate to building our addition, but it is germane to any old house owner whose white bath tub isn't quite up to snuff.  Ours is about 35 years old and wasn't used much until we moved in two years ago.  But somewhere along the way it got a 3/8" chip right by the drain.  A 3/8" chip doesn't warrant an entire bathtub resurfacing in my opinion when the rest of the tub looks good.

The first time I tried to fix the chip I went to the hardware store and bought the porcelain-repair epoxy stuff.  I mixed it up per directions, put it on in two coats, let it dry thoroughly between coats, and admired my handiwork a few hours later.  The fix only lasted about 2 weeks...I started seeing rust stains under the white coating and then the whole patch fell off.  Well, I thought maybe I hadn't sanded and cleaned the area thoroughly enough, so I went back, spent another $6 and tried it again.  Looked good again.  Two weeks later, same deal.  So, I got to thinking what else could I use?  Then it occurred to me that white nail polish just might be the answer.  And if it didn't work, I could remove it easily with nail polish remover.  I'm a big fan of easily-reversible fixes.

So, I went to CVS, bought one that was about the same slightly-off-white shade as our 35-year old tub and tried two coats.  Four weeks later, it still looks great.  The plastic bumper on my white Prius has a few dings that need some cosmetics, so I'm going use it there next.

The patch is located at about 1 o'clock.

Sunday, August 7, 2011

cedar roof and a Rainhandler gutter

8-7-2011:
For the past week and one-half, Scott's son, Scotty, and our friend J.P. (Jamie) Hand have been putting on the new cedar shingle roof over the addition.  The main block has a cedar roof and we felt that the addition should have one, too.  We got our Canadian cedar shingles from a supplier in Lancaster County, PA and also the copper-coated lead for the valley flashing.  The valley flashing is very, very expensive, so we asked around for alteratives; someone mentioned terne-coated steel, while someone else thought they'd heard of a new-to-the-market plastic-based flashing.  In the end, we decided that we didn't want to skimp on the roof since the roof protects everything under it!!  So, we went with the copper-coated lead.  The guys used a wood mallet to bend the edges of the flashing and found that the old-fashioned, hand-held break worked better than the new one!


Scott walks past the addition while J.P. Hand (to the left) and Scotty (on the right) work on the scaffold as they start to lay the cedar shingle roof.

Scotty uses a wooden mallet to flatten the edges of the valley flashing.

Scott Sr. holds the old-fashioned break that he used to turn the edges on the valley flashing.  He also used it to bend the flashing in the middle to sit properly in the valleys.

The guys will be done with the roof in another day or so.  I should mention that Jamie is really good at laying a cedar shake roof; he's very particular about the shingles and will reject those in the bundle that are "boxy" (curled) or are otherwise imperfect.  He also staggers them properly and does the right overhang.

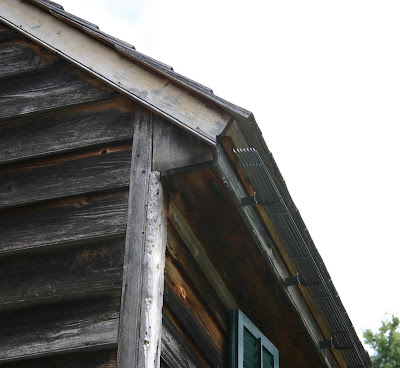
The Rainhandler gutter was something we finally in ordered in June and Scott put it up a few weeks ago on the front elevation of the main block.  In case you're not familiar with it, it's a fairly new gutter system that broadcasts the rain away from the building using a series of staggered, slanted aluminum strips that attach to the fascia board.  They used to advertise in Old House Journal, but I found them doing a google search.   http://www.rainhandler.com/ We ordered the brown color and before ordering consulted their very well-written directions on-line.  We determined we needed to buy spacers as well so the rain would hit the strips just right.  It took Scott a few hours to install them and we couldn't be happier.  They shipped quickly and were packaged safely for the trip.  They look great!  You really have to look closely to see them, and since we're 100' off the road, I'm sure most folks don't even notice them.  I think they're prefect for historic buildings, the facade (front elevation) at least.  We have some drainage issues in the back of the house (thanks to the new septic system), so we're going with traditional gutters back there.


The Rainhandler gutter as installed on the front of the house.

Money tree update:  I'm up to three free donuts at Acme.  At least they're tasty.....

Wednesday, July 27, 2011

The timber frame addition is up!

On Monday (July 25th), four timber framers from Riehl's Construction in Lancaster County, PA arrived a little after 8 a.m.  They brought two trailers of oak timbers, chain saws, tool belts, a variety of hand tools, and a lot of energy!  We provided a large cooler filled with ice and cold drinks, a box of donuts for the morning snack, and many interested spectators who came and went. 

The framers went right to work, unloading the mostly-precut timbers and preparing them for raising.  After double-checking Scott's layout (they didn't believe him when he said he was within 1/32", but they discovered he was right!) and confirming the ceiling heights, they cut the bottoms of the 7" x 7" square posts to the proper height, mortised them into the girts, and stood the first pair up about 90 minutes later.  It was incredible to watch them using a combination of modern tools (chain saws, saws-alls, drills) with old-fashioned chisels to get the tenons on the posts and girts just the right size and shape.   It took some finesse on the forklift operator's part to stand the first set into place against the original part of the house.   Two hundred years ago, each set would have been raised by many men pushing the beams up with long poles.


Scott protected the plywood- covered first floor with a tarp; pulling it off was the first thing they did.

They're standing the first set of beams against the original house.  It took all four of them.


After the first set was up, the rest were placed like a carefully-choreographed dance.  They only had one page of drawings, but that's all they needed for our smallish (16' x 28') addition.  I know they've done this hundreds, probably thousands of times, but it was awe-inspiring to watch.  And when they hammered the pegs into the holes I almost got goose-bumps (hey, I'm an architectural historian after all).


The joists for the first floor overhead, bundled together, are lowered onto the frame for placement.

Hammering one of the pegs (treenails) into place.

Two hundred years ago, the wives of all the menfolk would've prepared a huge feast of home-cooked food to be eaten during the house raising.  If only I had the time!  Instead, I took their lunch orders and grabbed some sandwiches from the closest WaWa, along with with a box of Entemann chocolate chip cookies.  There are some things I love about life in the 21st century!

Four and one-half hours later (not including a half-hour lunch break) the frame was finished.  Their part, at least.  Scott and his son, Scotty, then put up the rafters after they left and had them finished (except for the valley rafters) just before the first drops of rain started to fall.  Thank goodness our good friend JP Hand loaned us a huge tarp to keep everything dry until the wood shingle roof goes on and the clapboard is in place.


Our friend Al looks up at the beams over the kitchen-to-be.  The opening to the right is the stairwell.

Right after the framers left, Scott and Scotty started putting the rafters up.

My dear husband is working his tail off in the addition as I sit here and write this.  My contribution to the project will begin in another few weeks, once the windows arrive.  I'm the designated painter (I love painting believe it or not) and we want to have the divided-light windows and their frames primed and painted before Scott puts them in place.  I also have to paint the kitchen cabinets and finish the bathroom vanity that Scott made a few months ago.  (Wait till you see them!!) Yes, I will be busy indeed and all of this while still working full time.  Guess it will be lots of nights and weekends, but that's how we managed to restore this house before we moved in two years ago.

In retrospect--going the timber frame route was perfect for us and the ideal solution for an addition to our historic, ca. 1790 timber-framed house.  Exposed joists and corner posts are not for everyone.  It is a fast and less-expensive way to frame a house or an addition, and we couldn't be happier with the result.

We still have a long way to go.  Roof, walls, floors.  Plumbing and electric.  And, we're installing a Unico duct work system with a Unichiller so we can have AC and heat that is way more efficient than the electric baseboard we use now.  There will be plenty more to write about.

Money tree update--nothing yet beyond the free donut from Acme.

Saturday, July 9, 2011

Foundation Finished!

I'm still surprised that I'm writing today (Saturday) that the foundation is finished.  Scott poured the concrete on Tuesday, the mason (Les) came Wednesday, and by Friday afternoon, DONE!

Les is a great guy...he's been a mason all his life, but he also carves decoys and has a few acres in asparagus that he sells.  He also collects antique tractors.  He's retired, but said he'd help us when the time came.  Scott had everything laid out for him, so all he had to do was "butter" the blocks and bricks, then set them.  The block work went up easily and so did the antique bricks (which I helped to clean) that were put around the upper row of blocks.  They match perfectly the antique bricks that were used around the foundation of the original house.

Unfortunately, we had 3.5" of rain Thursday night, which washed a lot of dirt into the hole around the outside of the foundation.  Scott spent this morning digging it out so it can dry and he can paint the exterior of the blocks with tar.

Scott's using a steel I-beam down the center of the foundation to help stiffen the joists.  He told me this morning we could hold a dance in there without the floors bouncing!  You can see the foundations for the I-beams in the photo.  You can also see the sewer line for the septic system.  Actually, this is the old septic system that we're still using; we'll connect into the new one when the plumber comes in a month or two.  It was disconnected for 6 hours each day when the mason was here, but with a porta-potty on site the inconvience was minor.

Scott will put the sills and joists in this week.  Either late this coming week or early the following week, the timber framers from Lancaster County, PA (Riehl Construction) will come and raise the oak heavy timber frame.  I'm told it will only take a few hours.  You can believe I'll be photographing the whole event.

How wonderful to write with no major snafus, drama, mistakes, etc. to relate.


framed, rebarred, and ready to pour


complete and ready for tar, sills, joists
 Money tree update:  We're still waiting for a huge cache of money to come our way.  I did, however, win a free donut at Acme.  They're having a big summer sweepstakes where you collect tokens to paste onto various prizes.  The tokens come with store coupons, too, and I won a free donut.  I guess it's a start...

Wednesday, June 29, 2011

You know what they say about the word "assume"

We installed the new septic system without too many glitches.  The next step is to dig the trench for the foundation, line it with rebar, and then have it inspected before pouring the concrete.

George had given us the plans (approved by the county health department) for the septic system he put in 30+ years ago when he moved the house here.  The plans showed that the 750-gallon tank was located exactly where the addition is to be built.  A few weeks ago, Scott went out with a long  metal-rod probe and hit what he thought was the tank right about where the plans said it was.  We assumed that was its location.

Well, this week, Scott started digging exploratory holes to see exactly where the tank is in relation to the trenches we need to dig for the foundation.  And guess what?  The tank is no where to be found.  He found the exit pipe and followed it for quite a ways past the house, past the end of where our additon is going, and way past where it shows on the plans.  We still don't know where it is.  The probe must've hit a rock that Scott mistook for the tank.

This is good news and bad news.  Good news:  it will be easier for us to dig the new foundation knowing we don't have the old tank to either remove (heaven forbid) or demolish in place after having it pumped out.  Bad news:  we probably could've revised our plans so we didn't have to spend  the extra money to install a new septic system.

Lesson learned:  don't trust the plans given you for earlier work you can't see.   In our case, what was installed is way different from what shows on the plans.  I wish we'd gone looking for the old septic tank before we contacted the engineer to design a whole new system for us.  Maybe by posting this, you won't make the same mistake we did.

Scavenger Hunt, part II

I mentioned in a previous post that we were scavenging historic building materials to use in the addition.  I'm a firm believer in the saying that a historic building is a green building because of the investment in labor and natural resources that the already-built house represents.  The same goes for building components.  Recycling materials is a green option to filling your cart at one of the big box home centers.

We've got historic doors from a ca. 1800 house that we're recycling and they've got their original door locks.  Scott, cabinet maker that he is, decided to make a base cabinet for the bathroom sink using heart pine boards that had been submerged for 100 years while standing sentinel for a bridge abutment.  A co-worker saved them from the dumpster when the bridge was re-built some 10 years ago and Scott brokered a deal to get a few hundred board feet.  A local sawyer (now retired) believes that the planks were sawn from trees that were already 100 years old when placed as part of the bridge 100 years ago.  They are knot-free and beautiful, and the cabinet is spectacular!  We're putting a copper basin sink on top with copper faucets and the casual look is just what we wanted.  I'll post a photo once it's in place.

George left us some beautiful old floor boards of both hard pine and cedar in what is now Scott's workshop.  Those will get placed underfoot in the kitchen, but we don't have quite enough so we're looking for some more. 

If we can't find any, I may have to make old boards out of new ones.  Something you don't know about me is that I'm a painter, trained by my mother who was a professional "Early American decorator."  I learned theorem and tole painting from her, but then discovered a passion for realistic oil painting in the style of Philadelphia's well-known Peale family of artists.  I'm self-taught in the art of faux painting and I honed my talents restoring our old house.  For example, Scott filled the holes in the exposed joists (drilled there for electrical wires) in our living room and I faux-painted knots over the patched holes in the beams to match others.  Folks cannot tell which ones are original and which ones are fake.

We're also reusing historic bricks for the foundation and I learned first-hand yesterday what it takes to chip mortar carefully, very carefully, from used bricks.  The old lime mortar is fairly easy to remove, but the "newer" stuff with Portland cement takes strength, finess, and a whole lot of patience.  I'll leave those for Scott to clean!

George also left us a pile of used, historic bricks that were left-over from building the foundation of the original house when it was moved here in 1975.  But, many are broken and I worried that they'd have to be thrown in the dumpster.  We spent a few days in Williamsburg last fall and during our meanderings in the historic area, I looked down and noticed I was walking on a sidewalk made largely entirely from broken bricks.  Perfect!  I took several photos and will be modeling our patio and sidewalk of used bricks following the random patterns I saw there.


Working with historic buildings professionally as an architectural historian, I've learned that our forefathers and foremothers didn't waste a thing.  Houses were moved regularly; in fact, I found a reference dated 1767 that mentioned a house here in Cape May County being moved by a wealthy land owner to a different location.  Houses were also recycled for different purposes, too, often becoming barns or shops, and vice versa once their original use was outdated.  Similarly, the joists in what is now our kitchen were re-used from a much-earlier house and then recycled in ours around 1830 when the kitchen lean-to was rebuilt.

I like to think that Scott and I are following in the footsteps of those Cape May countians before us who wasted nothing and had no idea they were living the "green movement" a few centuries ahead of time.